INTRODUCTION Basic Life Support (BLS) is the foundation of emergency cardiovascular care that focuses on maintaining circulation and breathing through high-quality CPR and early use of an AED (Automated External Defibrillator).Learning BLS equips healthcare providers and lay rescuers with the essential knowledge and skills to save lives during cardiac arrest or other life-threatening emergencies *LEARNING OUTCOMES* After completing this session on BLS Concepts and Adult Resuscitation, the learner should be able to: 1. UNDERSTAND THE CONCEPT AND IMPORTANCE OF BLS • Define Basic Life Support (BLS) and explain its role in the Chain of Survival. • Describe how early recognition, early CPR, and early defibrillation increase survival rates. • Explain the difference between BLS and Advanced Life Support (ALS). • Understand when and why BLS should be initiated in an emergency. 2. RECOGNIZE CARDIAC ARREST AND LIFE-THREATENING EMERGENCIES • Identify the signs and symptoms of cardiac arrest, including unresponsiveness, no breathing, or only gasping. • Recognize the signs of respiratory distress, choking, and sudden collapse. • Demonstrate how to quickly assess responsiveness and breathing in an adult. • Perform a rapid scene assessment to ensure safety before starting CPR. 3. APPLY THE ADULT CHAIN OF SURVIVAL • Explain each link in the Adult Chain of Survival: 1. Early recognition and call for help (activation of emergency response). 2. Early CPR with emphasis on chest compressions. 3. Rapid defibrillation (use of AED). 4. Effective advanced life support. 5. Integrated post-cardiac arrest care. • Discuss how teamwork and communication improve outcomes during resuscitation. 4. DEMONSTRATE HIGH-QUALITY ADULT CPR • Describe and demonstrate the correct sequence of CPR (C–A–B): C – Circulation (Compressions) A – Airway B – Breathing • Perform chest compressions at the correct: ° Depth: 2 inches (5 cm) ° Rate: 100–120 compressions per minute • Allow full chest recoil after each compression. • Deliver effective rescue breaths using mouth-to-mouth or barrier device: ° Ratio: 30 compressions to 2 breaths ° Each breath should last 1 second, with visible chest rise. • Minimize interruptions in chest compressions to less than 10 seconds. 5. USE AN AUTOMATED EXTERNAL DEFIBRILLATOR (AED) EFFECTIVELY • Identify when an AED should be used in an unresponsive, pulseless adult. • Demonstrate how to operate an AED safely: 1. Turn on the device. 2. Attach electrode pads correctly. 3. Ensure no one touches the patient during analysis or shock delivery. 4. Follow AED prompts and resume CPR immediately after shock. • Understand safety precautions during AED use (avoid water, metal contact, or touching the victim during shock). 6. PERFORM BLS IN TEAM RESUSCITATION • Explain the roles of team members during adult CPR (compressor, ventilator, AED operator, leader). • Communicate clearly and perform coordinated tasks to ensure efficient resuscitation. • Demonstrate proper rotation of rescuers every 2 minutes to prevent fatigue. 7. MANAGE SPECIAL RESUSCITATION SITUATIONS • Apply BLS principles in: • Drowning victims • Trauma cases • Electrocution • Pregnant patients • Suspected spinal injury • Modify resuscitation steps appropriately in each case. 8. UNDERSTAND ETHICAL AND SAFETY CONSIDERATIONS • Recognize situations when CPR should not be initiated (e.g., obvious signs of death, DNR order). • Follow infection control measures: use of gloves, masks, and barrier devices. • Ensure personal and environmental safety during resuscitation. 9. EVALUATE THE EFFECTIVENESS OF RESUSCITATION • Identify signs of effective CPR (chest rise, pulse return, patient movement). • Recognize Return of Spontaneous Circulation (ROSC) and transition to post-cardiac arrest care. • Know when to stop CPR (e.g., victim recovers, rescuer exhaustion, arrival of advanced help). 10. BUILD CONFIDENCE IN EMERGENCY RESPONSE • Develop quick decision-making skills in emergencies. • Build confidence to perform CPR effectively without hesitation. • Understand that any attempt at resuscitation is better than none.
Introduction The 2020 American Heart Association (AHA) Guidelines for Basic Life Support (BLS) and Cardiopulmonary Resuscitation (CPR) introduced several important updates based on new scientific evidence and global studies. These changes aim to improve the quality of resuscitation, enhance survival outcomes, and strengthen the continuity of care after cardiac arrest. The emphasis is on early recognition, high-quality CPR, teamwork, and long-term recovery. 1. Continued Emphasis on High-Quality Chest Compressions The 2020 update continues to stress that the quality of compressions directly affects survival chances. 2. Dispatcher-Assisted CPR Emergency dispatchers are now expected to recognize possible cardiac arrest from a phone call and instruct callers to start chest compressions immediately, even if they are untrained. 3. Compression-Only CPR for Lay Rescuers Laypersons who are not trained or who are unwilling to give rescue breaths should perform compression-only CPR. 4. Updated Adult Chain of Survival The 2020 guidelines revised the Adult Chain of Survival to include a new link focused on recovery and rehabilitation. The addition of “recovery” acknowledges that survival includes not just restoring heartbeat but also ensuring physical and emotional recovery after resuscitation. 5 Airway Management and Ventilation The recommended CPR sequence remains C–A–B (Compressions–Airway–Breathing). 6. Preference for IV Access Over IO Access During resuscitation, intravenous (IV) access is now preferred for medication delivery. better drug circulation and outcomes. 7. Use of Feedback and Monitoring Devices The 2020 guidelines encourage the use of real-time feedback devices to ensure high-quality CPR. 8. Cardiac Arrest in Pregnancy 9. Post-Cardiac Arrest Care and Neuroprognostication The 2020 guidelines place strong emphasis on post-cardiac arrest care to improve neurological recovery. 10. Double Sequential Defibrillation Not Recommended Current evidence does not show clear benefits, and it may increase the risk of equipment damage or injury. 11. Team Dynamics and Communication The guidelines reaffirm the importance of effective teamwork and communication during resuscitation. 12. Ethical and Safety Considerations The 2020 update emphasizes rescuer safety, infection prevention, and ethical practice: Note: The 2020 BLS/CPR updates highlight that survival from cardiac arrest depends on early recognition, immediate high-quality CPR, rapid defibrillation, and effective post-resuscitation care. Compression-only CPR for lay rescuers, improved dispatcher guidance, and the focus on recovery are among the most notable advancements. Overall, the updates aim to make CPR simpler, faster, and more effective — ensuring that every rescuer, whether trained or not, can act confidently to save a life.
INTRODUCTION The Chain of Survival refers to the sequence of actions that must be performed quickly and correctly to give a person the best possible chance of surviving a cardiac arrest. Each action (called a “link”) is vital — if any link is weak or delayed, the whole chain becomes ineffective. In an emergency, every second counts, and the strength of the chain depends on how quickly and effectively we act. THE FIVE LINKS IN THE ADULT CHAIN OF SURVIVAL 1. Immediate Recognition of Cardiac Arrest and Activation of Emergency Response 2. Early Cardiopulmonary Resuscitation (CPR) with Emphasis on Chest Compressions 3. Rapid Defibrillation Defibrillation means giving an electric shock to the heart to restore its normal rhythm. Most adult cardiac arrests are due to ventricular fibrillation (VF) or pulseless ventricular tachycardia (VT) — both require a shock to restart the heart. 4. Effective Advanced Life Support (ALS) The goal is to stabilize the victim’s heart, breathing, and circulation to prepare for hospital care. 5. Integrated Post–Cardiac Arrest Care Once the person’s heart starts beating again (ROSC – Return of Spontaneous Circulation), care continues in the hospital. THE PEDIATRIC CHAIN OF SURVIVAL (Used for children and infants) 1. Prevention of cardiac arrest 2. Early CPR 3. Prompt activation of emergency response 4. Effective advanced life support 5. Integrated post–cardiac arrest care Note: Most cardiac arrests in children result from breathing problems or shock, not sudden heart failure — so prevention and early CPR are the most important steps.
INTRODUCTION BASIC LIFE SUPPORT (BLS) refers to the immediate care given to a person experiencing life-threatening emergencies such as cardiac arrest, respiratory arrest, or airway obstruction, before advanced medical help arrives. It focuses on maintaining circulation, airway, and breathing (the “CAB” sequence) to preserve vital organ function until more definitive treatment is provided. DEFINITION Basic Life Support (BLS) is a set of techniques and procedures used to support and maintain breathing and circulation in a person whose heart or breathing has stopped or is inadequate. It includes recognition of cardiac arrest, activation of emergency response, and immediate initiation of high-quality CPR and early defibrillation when indicated. *OBJECTIVES OF BLS* 1. Preserve life – sustain breathing and circulation until professional help arrives. 2. Prevent deterioration – stop the condition from worsening. 3. Promote recovery – support vital organ function and buy time for advanced care. 4. Provide comfort and reassurance to the patient if conscious. THE PRINCIPLES OF BASIC LIFE SUPPORT: BLS principles revolve around early recognition, early response, and effective intervention. These are often described using the Chain of Survival, the ABCs (or CAB) of resuscitation, and high-quality CPR principles. 1. EARLY RECOGNITION & ACTIVATION OF EMERGENCY RESPONSE 2. THE “CAB” SEQUENCE The current resuscitation guidelines (2020 AHA) emphasize C – A – B, meaning: ✓ Open the airway using the head-tilt, chin-lift technique. ✓ If trauma is suspected, use jaw-thrust maneuver without tilting the head. ✓ Ensure airway is clear of foreign objects or secretions. B – Breathing ✓ Give 2 rescue breaths after every 30 compressions (for trained rescuers). ✓ Each breath should last 1 second, making the chest visibly rise. ✓ Avoid excessive ventilation. ✓ If you cannot provide rescue breaths, continue hands-only CPR until help arrives. 3. HIGH-QUALITY CPR PRINCIPLES High-quality CPR improves the chances of survival and neurological recovery. Key components include: 1. Start compressions quickly – within 10 seconds of recognition of cardiac arrest. 2. Push hard and fast – maintain correct rate and depth. 3. Allow full chest recoil after each compression. 4. Minimize interruptions in chest compressions. 5. Avoid excessive ventilation. 6. Rotate rescuers every 2 minutes to prevent fatigue. 7. Use AED as soon as it is available. 4. EARLY DEFIBRILLATION Defibrillation is critical in cardiac arrest due to ventricular fibrillation (VF) or pulseless ventricular tachycardia (VT). The AED analyzes the heart rhythm and delivers a shock if needed. Steps: 1. Turn on AED. 2. Apply pads to the patient’s bare chest. 3. Follow the voice prompts. 4. Ensure no one touches the patient during analysis and shock delivery. 5. Resume CPR immediately after the shock. 5. TEAMWORK IN BLS • BLS can be performed by a single rescuer or a team. • In a team setting, effective communication, role assignment, and coordination are vital. Example roles: one person gives compressions, another manages the airway, and another operates the AED. 6. THE CHAIN OF SURVIVAL. The Chain of Survival represents the essential links that increase survival from sudden cardiac arrest. For Adults: 1. Early recognition and activation of EMS. 2. Early CPR with an emphasis on chest compressions. 3. Rapid defibrillation (AED use). 4. Effective advanced life support (ALS). 5. Post-cardiac arrest care. For Children and Infants: 1. Prevention of arrest. 2. Early CPR. 3. Activation of EMS. 4. Effective advanced life support. 5. Post-cardiac arrest care. Each link is vital — a weak or delayed link reduces survival chances. 7. BREATHING AND AIRWAY MANAGEMENT If breathing is absent or abnormal (gasping only): Give rescue breaths using: • Mouth-to-mouth, • Mouth-to-mask, or • Bag-valve-mask (BVM) device if trained. Rescue Breathing Rates: Adult: 1 breath every 6 seconds (10 breaths per minute) if pulse present. Child/Infant: 1 breath every 2–3 seconds (20–30 breaths per minute) if pulse present. 8. RECOVERY POSITION • If the victim is breathing normally and has a pulse but is unconscious, place in the recovery position. • This helps keep the airway open and prevents aspiration. • Keep the head tilted slightly back and body supported on the side. 9. SAFETY CONSIDERATIONS • Ensure the scene is safe before approaching the victim. • Use personal protective equipment (PPE) – gloves, face shields, or masks. • Avoid unnecessary exposure to body fluids. • Do not perform mouth-to-mouth if not safe — use barrier devices. 10. SPECIAL SITUATIONSBLS • principles remain the same but adapt in special cases: - Drowning: give 2 rescue breaths before compressions. - Trauma: maintain spinal alignment; use jaw-thrust for airway. - Pregnancy: compress slightly higher on the chest and displace the uterus to the left. - Obesity or chest deformity: ensure proper hand placement and depth. 11.POST-RESUSCITATION CARE After Return of Spontaneous Circulation (ROSC): • Monitor airway, breathing, and circulation continuously. • Place patient in recovery position if breathing independently. • Provide oxygen, monitor vital signs, and prepare for transfer to advanced care. SUMMARY BLS is the foundation of emergency resuscitation. Focus on CAB – Compressions, Airway, Breathing. Early recognition, early CPR, and early defibrillation are key. Maintain high-quality CPR with minimal interruptions. Ensure scene safety, teamwork, and effective communication. Proper and timely BLS can double or triple the chance of survival after cardiac arrest.
INTRODUCTION While the basic steps of Adult Basic Life Support (BLS) are generally the same, certain special situations may require adjustments in technique or decision-making. Understanding these considerations ensures that resuscitation efforts remain safe, effective, and tailored to the patient’s condition or environment. 1. CPR IN PATIENTS WITH TRAUMA • In trauma cases (e.g., road accidents, falls, head injuries), assume spinal injury until proven otherwise. • When opening the airway, use the jaw-thrust maneuver instead of the head-tilt, chin-lift, to reduce neck movement. • If spinal immobilization devices (e.g., cervical collar) are in place, continue compressions and ventilation as best as possible. • Control severe bleeding quickly using direct pressure. • Do not delay CPR for minor injuries or dressing application. • If there is massive chest or abdominal injury, compressions may be less effective but should still be performed. 2. CPR IN DROWNING OR NEAR-DROWNING VICTIMS • The primary problem is respiratory arrest due to lack of oxygen, not cardiac arrest. • Start with 2 rescue breaths before chest compressions. • Ensure the airway is clear of water and debris. • If possible, perform CPR immediately at the scene, even in shallow water (after ensuring rescuer safety). •. Dry the chest quickly before attaching AED pads. • Hypothermia may be present — handle the victim gently and continue resuscitation longer than usual, as recovery can occur even after prolonged submersion in cold water. 3. CPR IN PREGNANT WOMEN • Cardiac arrest during pregnancy is rare but critical. • Perform standard compressions, but position the woman slightly tilted to her left side (about 15–30 degrees) to prevent the uterus from compressing major blood vessels. • If possible, manually displace the uterus to the left during CPR. • Use the same compression depth (at least 2 inches / 5 cm). • AED use is safe in pregnancy — do not hesitate to apply pads and deliver shocks. • If available, prepare for possible emergency delivery after resuscitation. 4. CPR IN OBESE (OVERWEIGHT) PATIENTS • Chest compressions may require greater force to achieve adequate depth. • Ensure correct hand placement (center of chest, lower half of sternum). • Maintain full recoil and avoid leaning on the chest. • Use longer pads or adjusted placement for AED if standard positions are difficult. • Monitor rescuer fatigue closely — alternate compressors if a second rescuer is present. 5. CPR IN OPIOID OVERDOSE OR POISONING • Victims may have slow or absent breathing but still have a pulse initially. • Check for pulse carefully; if absent, begin CPR immediately. • If naloxone (Narcan) is available, administer it as soon as possible (intranasal or IM). • Continue BLS procedures even after naloxone — breathing and heart rate may take time to normalize. • AED use remains appropriate. 6. CPR IN ELECTROCUTION • Ensure the power source is turned off before touching the victim. • Begin CPR immediately once the scene is safe. • Look for burn entry and exit wounds and treat as necessary. • AED can be used safely once contact with electricity is eliminated. • Victims of electric shock may have underlying arrhythmias, so rapid defibrillation is critical. 7. CPR IN HYPOTHERMIA • Victims are usually cold, pale, and unresponsive, but may still have slow, faint pulses. • Check pulse carefully for up to 10 seconds before starting CPR. • Begin CPR if no definite pulse is found. • Handle the victim gently — rough movements can trigger dangerous heart rhythms. • Remove wet clothing and start gradual rewarming. • AED use is safe, but shocks may be less effective until the body warms up. • Continue resuscitation efforts longer than usual; “no one is dead until they are warm and dead.” 8. CPR IN CHEST TRAUMA OR LUNG INJURY • Victims with rib fractures or chest injuries still require CPR — continue compressions even if ribs crack. • Ensure proper hand placement and adequate depth. • Be prepared for ineffective ventilation due to lung injury; maintain high-quality compressions. 9. CPR IN ENVIRONMENTAL HAZARDS • In fire or toxic gas exposure: Move the victim to fresh air before starting CPR. • In flooding or cold weather: Ensure rescuer safety first. • In confined spaces: Use alternative compression positions if standard kneeling is not possible. 10. DO NOT RESUSCITATE (DNR) OR TERMINATION DECISIONS • If there is a valid DNR order, CPR should not be started. • In clinical settings, follow your facility’s ethical and legal policies. • In the community, when unsure, start CPR — it is better to act than delay. SUMMARY Special situations require adaptation of BLS techniques, but the fundamental goal remains the same — to restore oxygen delivery and circulation to vital organs. Always: • Ensure scene safety first. • Adjust airway and compression techniques as needed. •Apply AED as soon as possible. • Continue CPR until help arrives or the victim recovers.
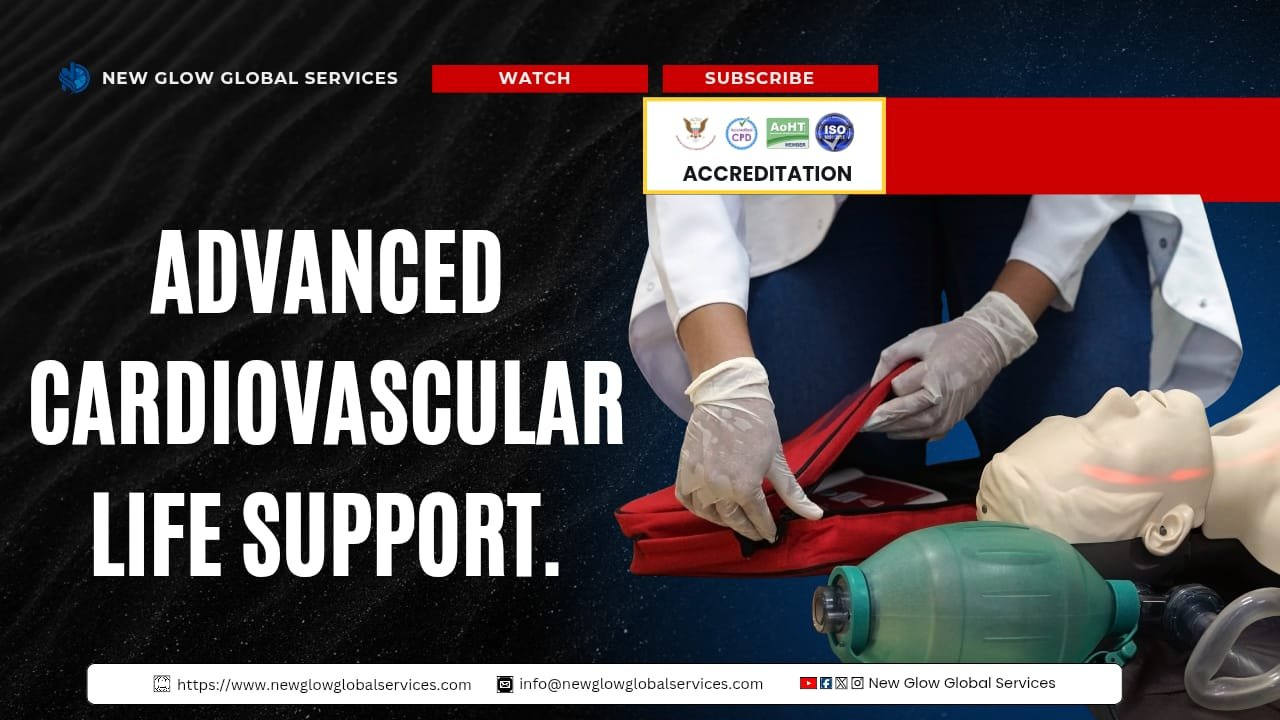
STEP-BY-STEP PROCEDURE FOR ONE-RESCUER BLS/CPR FOR ADULTS 1. ENSURE SCENE SAFETY • Before approaching, check the environment for hazards (fire, traffic, electricity, fluids, etc.). • Make sure it is safe for both you and the victim. 2. CHECK FOR RESPONSIVENESS • Tap the victim’s shoulders and shout: “Are you okay?” • If there is no response, proceed immediately. 3. CALL FOR HELP AND ACTIVATE EMS • Shout for help if others are nearby. • If you are alone, call emergency services (e.g., 112 or 911) using your phone’s speaker mode. • If an AED is available, bring it immediately. 4. CHECK FOR BREATHING AND PULSE (NO MORE THAN 10 SECONDS) • Open the airway using the head-tilt, chin-lift method. • Look, listen, and feel for normal breathing (not gasping). • At the same time, check the carotid pulse on one side of the neck. • If no normal breathing and no pulse, start CPR immediately. • If normal pulse but not breathing, give 1 rescue breath every 5–6 seconds. 5. BEGIN CHEST COMPRESSIONS HAND POSITION • Place the heel of one hand on the center of the chest (lower half of the sternum). • Place the other hand on top, interlocking the fingers. • Keep your shoulders directly over your hands. • Keep your elbows straight. COMPRESSION TECHNIQUE • Push hard and fast at a rate of 100–120 compressions per minute. • Depth: At least 2 inches (5 cm) but not more than 2.4 inches (6 cm). • Allow full chest recoil after each compression. • Minimize interruptions in compressions (less than 10 seconds). 6. PROVIDE RESCUE BREATHS (AFTER 30 COMPRESSIONS) AIRWAY MANAGEMENT • Use head-tilt, chin-lift to open the airway. • If spinal injury is suspected, use jaw-thrust (without head tilt). 7. USE OF AED (IF AVAILABLE) 1. Turn on the AED immediately. 2. Expose the victim’s chest and attach pads (one on the upper right chest, the other on the lower left side). 3. Follow the voice prompts from the AED. 4. Ensure no one touches the victim during rhythm analysis. 5. If shock advised, clear the area and deliver the shock. 6. Immediately resume CPR for 2 minutes before the next rhythm check. 8. CONTINUE CPR UNTIL • The victim shows signs of life (movement, breathing, pulse). • EMS arrives and takes over. • You are too exhausted to continue. • An AED instructs you to stop. 9. QUALITY CHECKPOINTS • Compression rate: 100–120/min. • Compression depth: 5–6 cm (2–2.4 inches). • Full chest recoil. ✓ Minimize pauses (<10 seconds). ✓ Avoid excessive ventilation. 10. COMMON ERRORS TO AVOID • Shallow compressions. • Leaning on the chest (not allowing recoil). • Inconsistent rate or rhythm. ,• Delays between compressions and breaths. • Forgetting to call for help or use AED early
TWO-RESCUER BLS/CPR FOR ADULTS (Basic Life Support When Two Rescuers Are Present)* The purpose of two-rescuer CPR is to maintain blood flow and oxygen delivery to the heart, brain, and vital organs while waiting for advanced medical help. It allows one rescuer to perform compressions while the other manages the airway and breathing, resulting in higher-quality CPR. *STEPS IN TWO-RESCUER BLS/CPR* 1. ENSURE SCENE SAFETY Both rescuers should first ensure that the environment is safe for themselves and the victim. Check for hazards such as fire, water, electricity, or traffic before beginning. 2. CHECK RESPONSIVENESS One rescuer taps the victim on the shoulder and shouts: “Are you okay?” If the victim does not respond, both rescuers should quickly proceed to the next step. 3. ACTIVATE EMERGENCY RESPONSE AND GET AED One rescuer immediately calls for emergency help (for example, 112 or 911) and brings the AED if available, while the other rescuer stays with the victim to check for breathing and a pulse. If the victim is not breathing normally and has no pulse, both rescuers start CPR right away. 4. START HIGH-QUALITY CPR Rescuer 1 (Compressor): • Locate the center of the chest (the lower half of the sternum). • Place the heel of one hand on this area, then place the other hand on top, keeping elbows straight. • Begin compressions at a rate of 100 to 120 per minute. • Push hard and fast to a depth of 2 to 2.4 inches (5 to 6 cm). • Allow the chest to fully recoil after each compression. • Count compressions out loud to help coordinate with your partner. Rescuer 2 (Airway and Breathing): • Stay at the victim’s head to open the airway using the head-tilt, chin-lift method. • After every 30 compressions, give 2 rescue breaths, each lasting about 1 second, watching for visible chest rise. • Ensure an effective seal if using a pocket mask or bag-valve-mask (BVM). • Both rescuers must work in perfect rhythm—one compresses while the other ventilates immediately after each 30 compressions. 5. COMPRESSION-TO-BREATH RATIO The ratio remains 30 compressions to 2 breaths for adults, whether performed by one rescuer or two. However, in two-rescuer CPR, this ratio is easier to maintain effectively due to teamwork. 6. USE OF AED • While CPR is ongoing, one rescuer should bring and prepare the Automated External Defibrillator (AED). • Turn on the AED and follow its voice prompts. • Expose the victim’s chest and attach the pads correctly — one on the upper right chest, and the other on the lower left side. • Make sure no one touches the victim during rhythm analysis. • If the AED advises a shock, loudly announce “Clear!” and deliver the shock. • Immediately resume CPR for 2 minutes before the next rhythm check. • One rescuer can continue compressions while the other sets up and operates the AED to avoid delays. 7. SWITCHING ROLES • To prevent exhaustion and maintain strong compressions, rescuers should switch roles about every 2 minutes or after five cycles of 30 compressions and 2 breaths. • The change should be quick—taking less than five seconds—so that CPR is not interrupted. 8. CONTINUE CPR UNTIL • The victim begins to move, breathe, or show a pulse. 9. TEAM COMMUNICATION • Good communication saves time and reduces mistakes. Rescuers should: • Speak clearly and loudly.
VENTILATION TECHNIQUES IN BLS/CPR (Mouth-to-Mouth, Mouth-to-Mask, and Bag-Mask Ventilation) INTRODUCTION Ventilation is a key part of Basic Life Support (BLS). It involves providing artificial breaths to deliver oxygen into the victim’s lungs when they are not breathing or not breathing effectively. During CPR, ventilation works together with chest compressions to keep oxygenated blood flowing to vital organs such as the brain and heart. There are three main ventilation techniques used in adult resuscitation: 1. Mouth-to-Mouth Ventilation 2. Mouth-to-Mask Ventilation 3. Bag-Mask Ventilation 1. MOUTH-TO-MOUTH VENTILATION Mouth-to-mouth ventilation is the most basic and direct method of giving rescue breaths. It is used when no barrier device or equipment is available. The rescuer breathes directly into the victim’s mouth to provide oxygen. PRECAUTIONS • Do not overinflate the lungs; excessive blowing may cause air to enter the stomach, leading to vomiting or aspiration. • Avoid if there are open wounds, severe facial trauma, or risk of infection. • If the chest does not rise, recheck the airway and mouth for obstructions and try again. ADVANTAGES • Simple and requires no equipment. • Can be done immediately anywhere. DISADVANTAGES • Risk of disease transmission. • May be uncomfortable for some rescuers. • Limited oxygen delivery compared to mask ventilation. 2. MOUTH-TO-MASK VENTILATION Mouth-to-mask ventilation uses a pocket mask or face shield to provide rescue breaths without direct mouth contact. This method increases hygiene, prevents disease transmission, and provides better oxygen delivery. ADVANTAGES • Reduces direct contact and infection risk. • Easier to maintain a proper seal than mouth-to-mouth. • More effective ventilation when done correctly. • Can be used with supplemental oxygen if available. DISADVANTAGES • Requires the rescuer to carry a mask. • May be difficult to seal properly if not trained. 3. BAG-MASK VENTILATION (BVM) The Bag-Valve-Mask (BVM) device is a manual resuscitator used to provide positive pressure ventilation to a victim who is not breathing or is inadequately breathing. It is commonly used by two rescuers during BLS and by healthcare providers in hospitals and ambulances. TYPES OF BAG-MASK USE • One-Rescuer BVM (less effective): difficult to maintain an airtight seal and compress the bag simultaneously. • Two-Rescuer BVM (recommended): one rescuer maintains the mask seal and airway, while the other squeezes the bag. ADVANTAGES • Provides higher oxygen concentration (up to 100%). • Effective for prolonged resuscitation. • Can be connected to oxygen supply. • Reduces infection risk. DISADVANTAGES • Requires training and coordination between rescuers. • Ineffective seal if performed by one person. • May cause stomach inflation if too much pressure or volume is used.
VENTILATION IN PEDIATRICS (Effective Breathing Support for Children and Infants) Ventilation in pediatrics is the process of providing oxygen to a child or infant who cannot breathe adequately on their own. It is a vital part of Basic Life Support (BLS) and Cardiopulmonary Resuscitation (CPR) because most pediatric cardiac arrests are caused by respiratory failure rather than heart problems *CAUSES OF RESPIRATORY FAILURE IN CHILDREN* 1. Airway obstruction (choking, foreign body, swelling). 2. Respiratory infections (pneumonia, bronchiolitis, asthma). 3. Drowning or aspiration. 4. Severe dehydration or shock. 5. Trauma to the chest or head. 6. Congenital heart or lung diseases. 7. Poisoning or drug overdose. *BASIC PRINCIPLES OF PEDIATRIC VENTILATION* 1. Open the airway properly before attempting any ventilation. 2. Deliver gentle breaths—children’s lungs are delicate. 3. Ensure visible chest rise with each breath. 4. Avoid excessive ventilation, which can cause gastric inflation or reduce blood flow to the heart. 5. Maintain a proper seal when using a mask or barrier device. *METHODS OF VENTILATION* A. Mouth-to-Mouth or Mouth-to-Nose Ventilation 1. Open the airway using head tilt–chin lift. 2. Pinch the child’s nose closed. 3. Place your mouth over the child’s mouth, making a tight seal. 4. Give 1 breath lasting about 1 second. 5. Watch for chest rise to confirm effective ventilation. 6. If the chest does not rise, reposition the head and try again. 7. Deliver 2 breaths after every 30 compressions (one rescuer) or 15 compressions (two rescuers). Note:: For infants, cover both the mouth and nose with your mouth to ensure a complete seal. B. Mouth-to-Mask Ventilation 1. Use a mask that fits the child’s face properly (covers mouth and nose but not the eyes). 2. Open the airway with head tilt–chin lift. 3. Place the mask firmly on the child’s face, using the E–C hand technique: Form a “C” with your thumb and index finger to hold the mask. Form an “E” with your other fingers to lift the jaw. 4. Deliver 1 breath every 3–5 seconds (12–20 breaths per minute) for children with a pulse but inadequate breathing. 5. Observe for chest rise to ensure the breath was effective C. Bag–Mask Ventilation (BVM) 1. Use an appropriately sized bag–mask device with oxygen if available. 2. Ensure the mask fits snugly on the child’s face. 3. Open the airway with head tilt–chin lift or jaw thrust. 4. Squeeze the bag gently to deliver 1 breath every 3–5 seconds (12–20 breaths per minute). 5. Watch for visible chest rise with each breath. 6. Avoid excessive pressure or volume to prevent barotrauma (lung injury). Note: If two rescuers are present, one should hold the mask with both hands and maintain the seal while the other squeezes the bag. *SIGNS OF EFFECTIVE VENTILATION* 1. Visible chest rise with each breath. 2. Improvement in skin color (pink, not blue). 3. Spontaneous breathing begins. 4. Pulse returns or strengthens. 5. Child begins to move or cough *INFECTION PREVENTION DURING VENTILATION* 1. Always use barrier devices (mask, face shield) when available. 2. Wash hands before and after resuscitation if possible. 3. Dispose of used devices properly. 4. Avoid direct mouth contact when protective equipment is available. BASIC LIFE SUPPORT (BLS) FOR INFANTS (0–12 MONTHS) Basic Life Support (BLS) for infants focuses on maintaining breathing and circulation in babies under one year of age who are unresponsive, not breathing, or have no pulse. Unlike adults, most infant cardiac arrests are caused by respiratory failure or airway obstruction rather than heart problems. Quick recognition and gentle, effective CPR can make the difference between life and death. *CHARACTERISTICS OF INFANTS (0–12 MONTHS)* 1. Fragile body and delicate chest wall. 2. Small airways — easily obstructed. 3. High oxygen demand and fast breathing rate. 4. Cardiac arrest usually follows breathing problems, not heart disease. 5. Require gentle handling during resuscitations *SEQUENCE OF INFANT BLS (C–A–B:* Compressions–Airway–Breathing) Step 1: Ensure Scene Safety Check that the environment is safe for you and the infant. Step 2: Check Responsiveness Gently tap the soles of the infant’s feet and call the baby’s name. If there is no response → proceed to the next step. Step 3: Shout for Help • Call for help or activate emergency response immediately. • If you are alone and witnessed the collapse, call emergency services first. • If unwitnessed, perform 2 minutes of CPR before leaving to get help. Step 4: Check Breathing and Pulse (within 10 seconds) • Look for chest movement, listen for breath sounds, and feel for the brachial pulse (inside the upper arm). • If no breathing and no pulse, start CPR immediately. • If there is a pulse but the infant is not breathing → give 1 breath every 3–5 seconds. *CHEST COMPRESSIONS* A. One-Rescuer Method 1. Place the infant on a firm, flat surface. 2. Use two fingers (index and middle fingers) just below the nipple line on the sternum. 3. Compress the chest about 4 cm (1½ inches) deep. 4. Rate: 100–120 compressions per minute. 5. Allow full chest recoil after each compression. 6. Minimize interruptions during compressions. 7. Compression–Ventilation Ratio: 30:2 (30 compressions, 2 breaths). B. Two-Rescuer Method 1. One rescuer performs compressions while the other gives breaths. 2. Use the two-thumb encircling hands technique: • Both hands encircle the infant’s chest. • Thumbs press on the sternum just below the nipple line. 3. Compress 4 cm (1½ inches) deep. 4. Ratio: 15 compressions to 2 breaths (15:2). 5. Switch roles every 2 minutes to prevent fatigue. *AIRWAY MANAGEMENT* 1. Open the airway using Head Tilt–Chin Lift (if no trauma). 2. If trauma is suspected, use Jaw Thrust without head tilt. 3. Keep the infant’s head in a neutral position — not too far back, as this may block the airway. RESCUE BREATHING 1. Cover both the infant’s mouth and nose with your mouth to make a complete seal. 2. Give 2 gentle breaths, each lasting 1 second, and watch for chest rise. 3. Avoid blowing too forcefully (infant lungs are small and fragile). 4. Continue cycles of 30:2 (one rescuer) or 15:2 (two rescuers). Note: If the chest does not rise, reposition the head and try again — do not continue without chest movement. USE OF AED IN INFANTS 1. Use an AED as soon as available. 2. Attach infant pads (if available); if not, use adult pads — one on the chest, one on the back (front-and-back placement). 3. Follow the AED’s voice prompts. 4. If a shock is advised, deliver it and immediately resume CPR. 5. If no shock is advised, continue CPR without delay. *CONTINUE CPR UNTIL* 1. The infant starts breathing or moving. 2. AED prompts you to stop. 3. Qualified help arrives. 4. You become too exhausted to continue. *POST-RESUSCITATION CARE* 1. Maintain an open airway and monitor breathing. 2. Keep the baby warm and dry 3. Provide oxygen if available. 4. Place in recovery position if breathing normally and responsive. 5. Observe for any breathing difficulties or cyanosis. 6. Prepare for transfer to a healthcare facility for further care. *KEY DIFFERENCES BETWEEN CHILD AND INFANT BLS* Aspect Child (1–8 years) Infant (0–12 months) Compression method. . One or two hands. Two fingers or two thumbs Compression depth 5 cm (2 inches) 4 cm (1½ inches) Pulse check Carotid or femoral Brachial Airway position Slight head tilt. Neutral head position Breathing method Mouth-to-mouth Mouth-to-mouth-and-nose. Compression–Ventilation Ratio (1 rescuer) 30:2 30:2 Compression–Ventilation Ratio (2 rescuers) 15:2 15:2 *IMPORTANT POINTS TO REMEMBER* 1. Begin compressions if no pulse or pulse <60 bpm with poor breathing. 2. Always ensure gentle pressure—do not compress too deeply. 3. Maintain correct hand/finger placement to avoid injury. 4. Give just enough breath to make the chest rise. 5. Avoid hyperventilation and over-compression. 6. Use barrier devices (mask or shield) to prevent infection. 7. Continue CPR without unnecessary pauses until help arrives. . *SUMMARY* 1. Infant BLS follows the C–A–B sequence: Compressions → Airway → Breathing. 2. Use 2 fingers (one rescuer) or 2 thumbs (two rescuers) for compressions. 3. Compression depth: 4 cm (1½ inches). 4. Compression rate: 100–120 per minute. 5. Ratio: 30:2 (one rescuer), 15:2 (two rescuers). 6. Always ensure effective chest rise with each breath. 7. Use infant AED pads and follow device prompts. 8. Gentle, early, and continuous CPR saves infant lives.
Use of an Automated External Defibrillator (AED) INTRODUCTION The Automated External Defibrillator (AED) is a portable, battery-powered device that analyzes the heart’s rhythm and, if necessary, delivers an electric shock to help restore a normal heartbeat in victims of sudden cardiac arrest (SCA). *BASIC PRINCIPLE* • When a person’s heart stops beating effectively, it often goes into an abnormal rhythm called ventricular fibrillation—a chaotic electrical activity that prevents the heart from pumping blood. • The AED delivers a controlled electrical shock to the heart muscle to stop the irregular rhythm and allow the heart’s natural pacemaker to restart a normal beat. • This process is called defibrillation. *STEPS IN USING AN AED (ADULT RESCUER SEQUENCE)* 1. TURN ON THE AED 2. EXPOSE THE CHEST 3. ATTACH AED PADS 4. LET THE AED ANALYZE THE RHYTHM 5. DELIVER THE SHOCK (IF ADVISED) 6. CONTINUE CPR AND FOLLOW PROMPTS. *CONCLUSION* Early use of an AED can mean the difference between life and death. When combined with high-quality CPR, it provides the best chance for the heart to restart and for the victim to survive. Remember: Call for help, start CPR, use the AED as soon as possible, and never stop until professional care arrives. *SPECIAL CONSIDERATIONS IN ADULT BLS (IF APPLICABLE)* *INTRODUCTION* While the basic steps of Adult Basic Life Support (BLS) are generally the same, certain special situations may require adjustments in technique or decision-making. Understanding these considerations ensures that resuscitation efforts remain safe, effective, and tailored to the patient’s condition or environment. 1. CPR IN PATIENTS WITH TRAUMA • In trauma cases (e.g., road accidents, falls, head injuries), assume spinal injury until proven otherwise. • When opening the airway, use the jaw-thrust maneuver instead of the head-tilt, chin-lift, to reduce neck movement. • If spinal immobilization devices (e.g., cervical collar) are in place, continue compressions and ventilation as best as possible. • Control severe bleeding quickly using direct pressure. • Do not delay CPR for minor injuries or dressing application. • If there is massive chest or abdominal injury, compressions may be less effective but should still be performed. 2. CPR IN DROWNING OR NEAR-DROWNING VICTIMS • The primary problem is respiratory arrest due to lack of oxygen, not cardiac arrest. • Start with 2 rescue breaths before chest compressions. • Ensure the airway is clear of water and debris. • If possible, perform CPR immediately at the scene, even in shallow water (after ensuring rescuer safety). • Dry the chest quickly before attaching AED pads. • Hypothermia may be present — handle the victim gently and continue resuscitation longer than usual, as recovery can occur even after prolonged submersion in cold water. 3. CPR IN PREGNANT WOMEN • Cardiac arrest during pregnancy is rare but critical. • Perform standard compressions, but position the woman slightly tilted to her left side (about 15–30 degrees) to prevent the uterus from compressing major blood vessels. • If possible, manually displace the uterus to the left during CPR. • Use the same compression depth (at least 2 inches / 5 cm). • AED use is safe in pregnancy — do not hesitate to apply pads and deliver shocks. • If available, prepare for possible emergency delivery after resuscitation. 4. CPR IN OBESE (OVERWEIGHT) PATIENTS • Chest compressions may require greater force to achieve adequate depth. • Ensure correct hand placement (center of chest, lower half of sternum). • Maintain full recoil and avoid leaning on the chest. • Use longer pads or adjusted placement for AED if standard positions are difficult. • Monitor rescuer fatigue closely — alternate compressors if a second rescuer is present. 5. CPR IN OPIOID OVERDOSE OR POISONING • Victims may have slow or absent breathing but still have a pulse initially. • Check for pulse carefully; if absent, begin CPR immediately. • If naloxone (Narcan) is available, administer it as soon as possible (intranasal or IM). • Continue BLS procedures even after naloxone — breathing and heart rate may take time to normalize. • AED use remains appropriate. 6. CPR IN ELECTROCUTION • Ensure the power source is turned off before touching the victim. • Begin CPR immediately once the scene is safe. • Look for burn entry and exit wounds and treat as necessary. • AED can be used safely once contact with electricity is eliminated. • Victims of electric shock may have underlying arrhythmias, so rapid defibrillation is critical. 7. CPR IN HYPOTHERMIA • Victims are usually cold, pale, and unresponsive, but may still have slow, faint pulses. • Check pulse carefully for up to 10 seconds before starting CPR. • Begin CPR if no definite pulse is found. • Handle the victim gently — rough movements can trigger dangerous heart rhythms. • Remove wet clothing and start gradual rewarming. • AED use is safe, but shocks may be less effective until the body warms up. • Continue resuscitation efforts longer than usual; “no one is dead until they are warm and dead.” 8. CPR IN CHEST TRAUMA OR LUNG INJURY • Victims with rib fractures or chest injuries still require CPR — continue compressions even if ribs crack. • Ensure proper hand placement and adequate depth. • Be prepared for ineffective ventilation due to lung injury; maintain high-quality compressions. 9. CPR IN ENVIRONMENTAL HAZARDS • In fire or toxic gas exposure: Move the victim to fresh air before starting CPR. • In flooding or cold weather: Ensure rescuer safety first. • In confined spaces: Use alternative compression positions if standard kneeling is not possible. 10. DO NOT RESUSCITATE (DNR) OR TERMINATION DECISIONS • If there is a valid DNR order, CPR should not be started. • In clinical settings, follow your facility’s ethical and legal policies. • In the community, when unsure, start CPR — it is better to act than delay.
USE OF AUTOMATED EXTERNAL DEFIBRILLATOR (AED) IN CHILDREN & INFANTS (Safe Defibrillation in Pediatric and Infant Resuscitation) An Automated External Defibrillator (AED) is a portable, computerized device that analyzes the heart rhythm and, if necessary, delivers an electric shock (defibrillation) to restore a normal heart rhythm during sudden cardiac arrest (SCA). In children and infants, early defibrillation can significantly improve survival — especially in cases of cardiac rhythm disturbances such as ventricular fibrillation (VF) or pulseless ventricular tachycardia (VT). *AGE GUIDELINES FOR AED USE* 1. Adults: 8 years and above — use a standard AED with adult pads. 2. Children: 1 to 8 years — use a pediatric AED system or child pads if available. 3. Infants (below 1 year): • Use a pediatric AED system if available. •If not available, use a standard AED with adult pads — it is better than no defibrillation at all. Note: Modern AEDs automatically adjust the energy level when pediatric pads are attached. *WHY AED USE IS IMPORTANT IN CHILDREN & INFANTS* 1. Restores normal heart rhythm in shockable rhythms (VF/VT). 2. Improves the effectiveness of CPR when used early. 3. Reduces time to defibrillation — a key factor in survival. 4. Easy to use — provides voice prompts to guide rescuers. 5. Safe and effective when used properly, even by laypersons. . *EQUIPMENT REQUIRED* 1. Automated External Defibrillator (AED). 2. Appropriate AED pads (child or adult). 3. Razor (if chest hair is thick — for older children). 4. Dry cloth/towel (if chest is wet). 5. Gloves and infection prevention materials. *STEPS FOR USING AED IN CHILDREN (1–8 YEARS)* Step 1: Turn On the AED • Open the lid or press the power button to activate the AED. • The device will give voice and visual prompts to guide you. Step 2: Expose the Chest • Remove clothing from the child’s chest. • Ensure the chest is dry and clean. Step 3: Attach the Pads • Use child pads if available. • Place one pad on the upper right chest (below the collarbone). • Place the second pad on the lower left chest (side of the rib cage, below the armpit). • Pads should not touch each other. Step 4: If Only Adult Pads Are Available • Use them if no child pads exist. • Place one pad on the center of the chest and the other on the back (between shoulder blades) this is called the front-and-back placement. Step 5: Allow the AED to Analyze the Rhythm • Stop all CPR and do not touch the child. • The AED will automatically analyze the heart rhythm. Step 6: Deliver the Shock (if advised) • Ensure no one is touching the child. • Loudly say, “Clear!” • Press the shock button when instructed. • Immediately resume CPR beginning with chest compressions (30:2 for one rescuer, 15:2 for two rescuers). Step 7: Follow AED Prompts • The AED will continue to analyze the rhythm every 2 minutes. • Continue following its instructions until: • The child starts breathing/moving, • Advanced help arrives, or • You are too exhausted to continue. . SUMMARY 1. AED delivers an electric shock to restore normal heart rhythm. 2. Use child pads for ages 1–8, and pediatric or adult pads (front-and-back) for infants under 1 year. 3. Turn on the device, attach pads, follow prompts, and resume CPR immediately after shocks. 4. Keep the environment dry and safe, and ensure no contact during analysis or shock. 5. Early AED use combined with effective CPR greatly improves survival in pediatric and infant cardiac arrest. *MODULE THREE* *Rescue Breathing / Mouth-to-Mouth Techniques* Rescue breathing (also known as mouth-to-mouth ventilation) is a lifesaving procedure that provides oxygen to a person who is not breathing or not breathing normally but still has a pulse. It can be performed alone or as part of CPR when cardiac arrest is suspected. *Purposes* • To maintain oxygen supply to vital organs, especially the brain and heart. • To prevent respiratory arrest from progressing to cardiac arrest. • To support breathing until spontaneous respiration returns or advanced help arrives. Indications • Victim is unconscious and not breathing normally, but has a pulse. • After clearing the airway in drowning, poisoning, or respiratory arrest cases. Steps for Mouth-to-Mouth Rescue Breathing (Adults) 1. Check Responsiveness – Tap and shout: “Are you okay?” 2. Open the Airway – Use the head tilt–chin lift method. 3. Check for Breathing – Look, listen, and feel for no more than 10 seconds. 4. Pinch the Nose Shut – To prevent air escape. 5. Make a Seal – Place your mouth fully over the victim’s mouth. 6. Give Two Breaths – • Each breath lasting about 1 second. • Watch for chest rise. • If chest doesn’t rise, reposition the head and try again. 7. Continue Breathing – Give 1 breath every 5–6 seconds (10–12 breaths per minute). 8. Recheck Pulse every 2 minutes. Mouth-to-Mouth for Children • Use smaller breaths — just enough to make the chest rise. • Give 1 breath every 3–5 seconds (12–20 breathes per minute). • Avoid over-inflation — it may cause stomach distension or vomiting. Mouth-to-Mouth-and-Nose for Infants • Cover both the mouth and nose with your mouth (their face is small). • Give gentle puffs of air, not full breaths. • Frequency: 1 breath every 3 seconds (20–30 per minute). • Watch for visible chest rise only. Advanced Rescue Breathing (If Included in Curriculum) 1. Use of Bag-Valve-Mask (BVM) • Provides positive pressure ventilation without mouth contact. • Requires training and often two rescuers: • One holds mask and maintains seal. • The other squeezes the bag. • Oxygen may be attached to the BVM (flow rate 10–15 L/min). Deliver 1 breath every: ✓ 5–6 seconds (adults) ✓ 3–5 seconds (children) ✓ 2–3 seconds (infants) Use of Advanced Airways (Endotracheal Tube / LMA) • Used by trained healthcare providers. • Allows continuous chest compressions while delivering breaths every 6 seconds (10 per minute). • No need for pause in compressions. • Ensure chest rise and monitor oxygen saturation. . Monitoring Effectiveness • Watch chest rise and fall. • Observe skin color improvement. • Use pulse oximetry or capnography if available. Relief of Choking (Adults, Children, Infants) Choking occurs when the airway is obstructed by a foreign object, blocking air flow to the lungs. It may be partial or complete. Signs of Complete Airway Obstruction • Inability to speak, breathe, or cough. • Hands clutching the throat (“universal choking sign”). • Cyanosis (bluish skin). • Loss of consciousness if not relieved quickly. For Responsive Adults and Children (Over 1 Year) Heimlich Maneuver (Abdominal Thrusts): 1. Stand behind the victim. 2. Wrap your arms around their waist. 3. Make a fist and place it above the navel, below the breastbone. 4. Grasp your fist with the other hand. 5. Perform quick, upward thrusts until the object is expelled or the person becomes unresponsive. For Unresponsive Adult or Child 1. Gently lower to the ground. 2. Call for help and activate emergency response system. 3. Begin CPR (starting with chest compressions). 4. Each time before giving breaths, open the mouth and look for the object. 5. Remove visible object only if easily accessible. For Infants (Under 1 Year) Back Blows and Chest Thrusts: 1. Support the head and neck. 2. Place the infant face down on your forearm (head lower than chest). 3. Deliver 5 firm back blows between the shoulder blades. 4. Turn the infant face up and give 5 chest thrusts (using two fingers just below nipple line). 5. Repeat until object is expelled or infant becomes unresponsive. 6. If unresponsive, start CPR immediately and check mouth for object before breaths. Key Skills to Demonstrate 1. Scene safety and assessment. 2. Checking responsiveness and breathing. 3. Activation of emergency response system. 4. High-quality CPR: Rate: 100–120 compressions/min. Depth: 2 inches (5 cm) in adults, 1½ inches (4 cm) in infants. • Allow full chest recoil. • Minimize interruptions. 5. Use of AED (Automated External Defibrillator). 6. Rescue breathing techniques. 7. Relief of choking maneuvers. Purpose of Video Demonstrations • Reinforce step-by-step techniques visually. • Build confidence and accuracy. • Allow learners to observe correct timing, hand placement, and coordination. • Encourage hands-on practice after viewing. Summary & Review • Rescue Breathing provides oxygen when the heart is still beating but breathing stops. • Mouth-to-Mouth and Mouth-to-Nose are key for infants and children. • Advanced Rescue Breathing includes use of BVM and airways by trained personnel. • Choking Relief differs by age: ✓ Adults/Children → Abdominal thrusts. ✓ Infants → Back blows and chest thrusts. ✓ Skill demonstration and practice are essential to improve speed, confidence, and success. ✓ Always ensure safety, call for help early, and use AED when cardiac arrest is suspected.
As the Super Admin of our platform, I bring over a decade of experience in managing and leading digital transformation initiatives. My journey began in the tech industry as a developer, and I have since evolved into a strategic leader with a focus on innovation and operational excellence. I am passionate about leveraging technology to solve complex problems and drive organizational growth. Outside of work, I enjoy mentoring aspiring tech professionals and staying updated with the latest industry trends.
No Review found


Discover Additional Learning Opportunities
 Beginner
 Intermediate
 Intermediate
 Intermediate
 Intermediate
.png)